We show you
how to open and use Disk Cleanup in Windows 10 and use its advanced mode to
free up even more space.
It’s smart
to buy a small SSD to run your OS, but this can lead to its own problems. All
too often, temporary files and deleted items can build up, getting your drive
so clogged that it can affect performance. Because of this, Microsoft has
created the Windows 10 disk cleanup tool, which you can utilize to free up
space on your C: drive or any other drive.
Unfortunately,
low disk space notifications don’t tend to direct you to this tool, instead
taking you to Windows storage settings. This leads many to wonder where disk
clean up is in Windows 10. Though it isn’t displayed prominently in the
settings app, you can find it quite easily in Control Panel or via the Start
Menu.
Running Disk
Cleanup in Windows 10 can free up space by deleting files that you don’t need.
The most savings are often found by deleting previous Windows installations and
files left in the recycle bin, but it also looks for temporary internet files,
thumbnails, error reports, and more. Cleaning up Windows 10 also gives you the
option to enable system compression, which can make your windows binaries and
program files smaller. Let’s get started on how to use it:
Ø How to Run and Use Windows 10 Disk Cleanup:
You can open
the regular Windows 10 Disk Cleanup via the Run tool, or proceed to the second
heading for advanced disk cleanup.
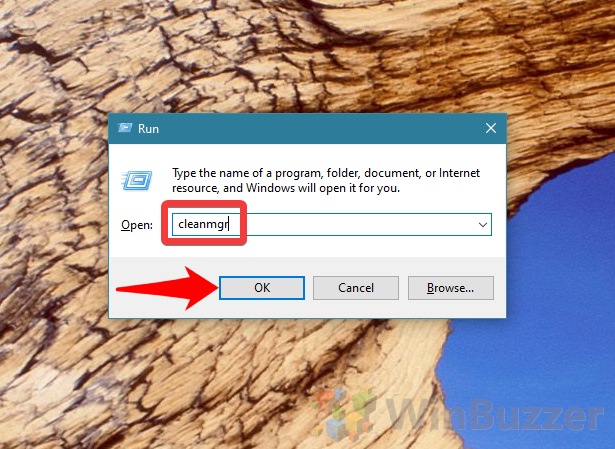
1. Open Disk Cleanup
Press “Windows + R” to
open the Run dialogue, type “cleanmgr”, and press “OK”.
2. Select the items you’d like to delete.
Tick the types of files you want to remove
and press “OK”.
3. Confirm your decision.
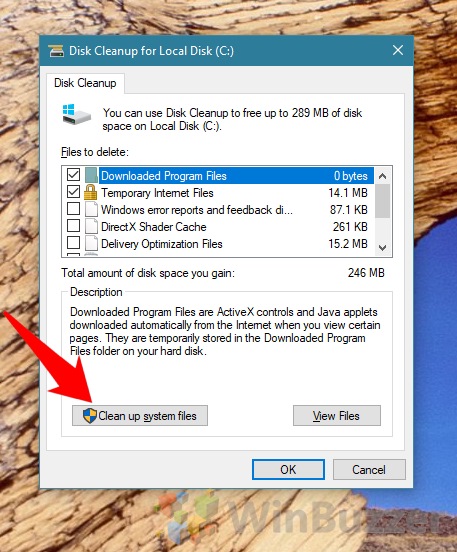
4. Clean up system files:
Back in the main Disk Cleanup
window, click on “Clean up system files” near the bottom.
5. Choose the system files you’d like to
remove and press “OK”.
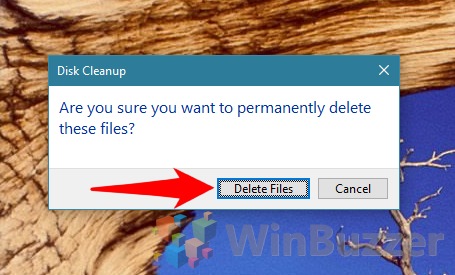
6. Accept the permanent deletion:
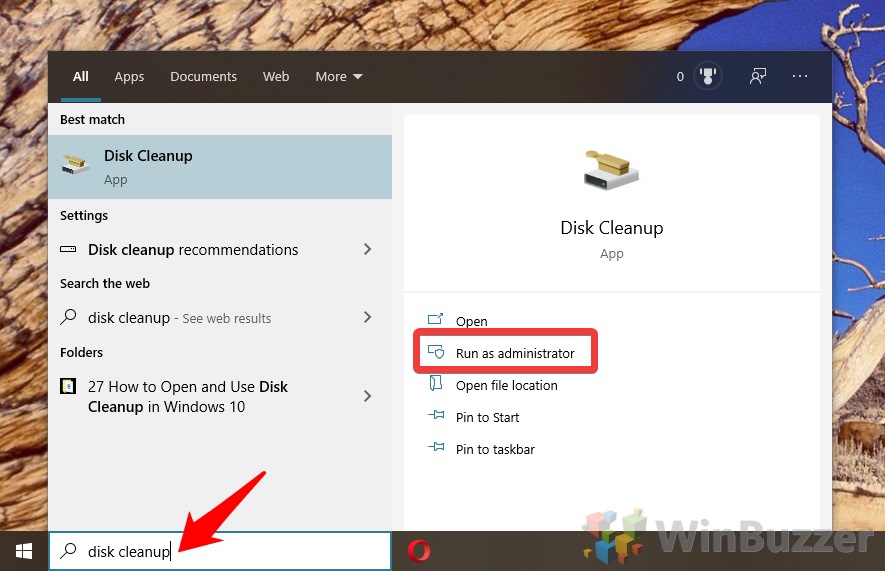
7. Open Disk Cleanup again as an admin:
In the Start Menu, type “Disk Cleanup”, click the first result, and
then the “Run as administrator” option.
8. Tick “Downloaded Program Files” and “Temporary
Internet Files”
Then click on “Clean up system files”.
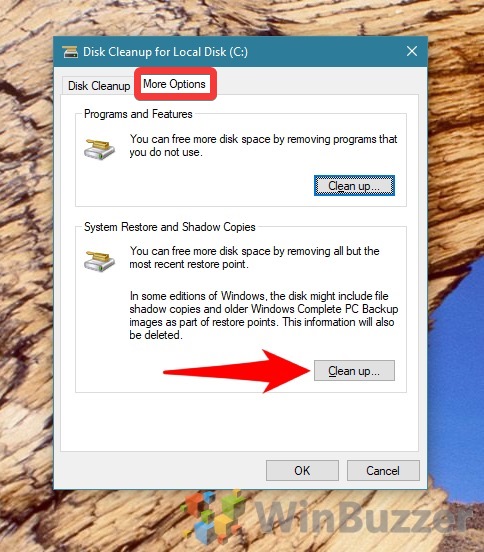
9. Open “More Options”
Switch to the “More Options” tab and click on “Clean
up…”.
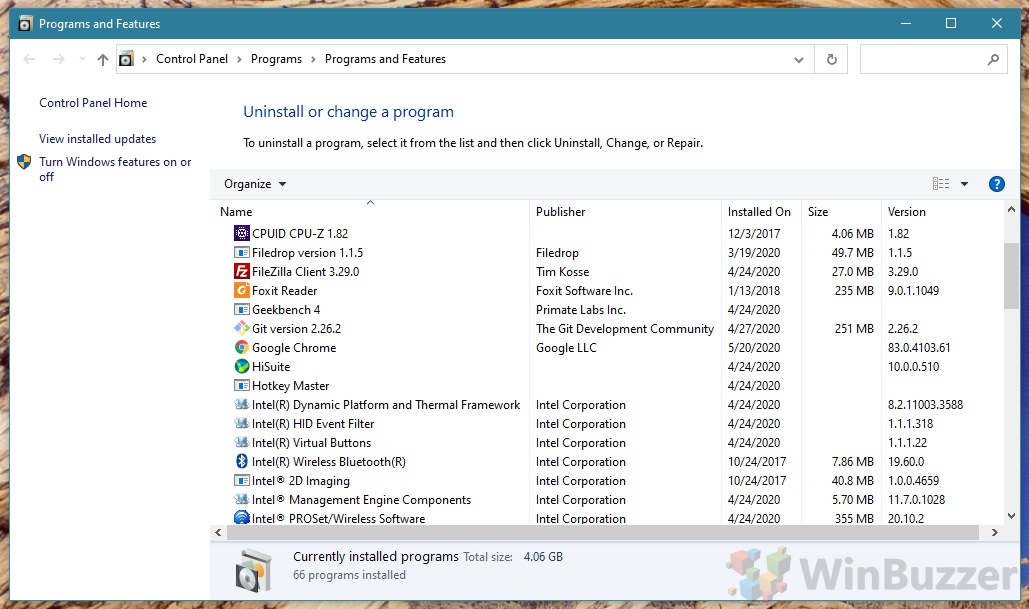
10. Uninstall unused programs:
You can now uninstall the programs you use the least by clicking on them and pressing “Uninstall” in the top bar. When you’re done, cross out the window
11. Clean up system restore and shadow copies
Back in the “More
Options” screen, look for the “System Restore and Shadow
Copies” heading and click “Clean up…”.
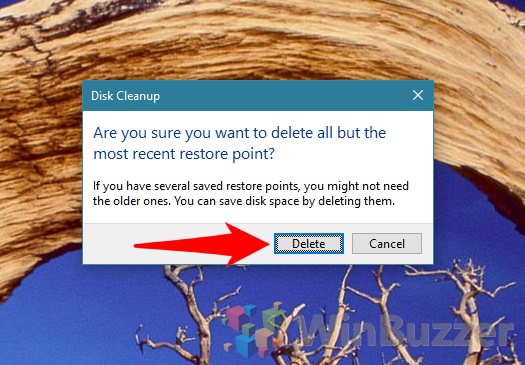
12. Confirm the deletion
Deleting your system restore points will still keep the latest one should you need to revert anything. Press “Delete” to remove all of the ones before that and free up space.
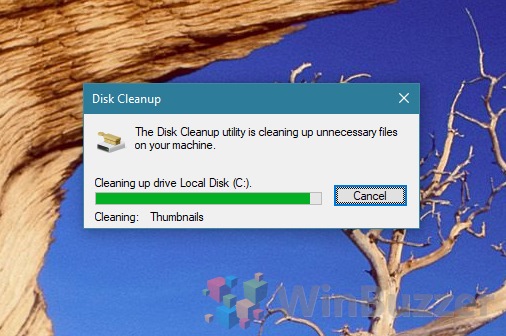
13. Wait for the process to complete
It should only take a couple of minutes.
Ø How
to Open Windows 10 Extended Disk Cleanup via Command Prompt
You
can clean up Windows 10 even more via the extended Disk Cleanup tool, which can
be accessed via the command line.
1. Open Command Prompt:
Press the Windows key and
type “command prompt”. Select the first entry under ‘Best match’
and choose “Run as administrator”.
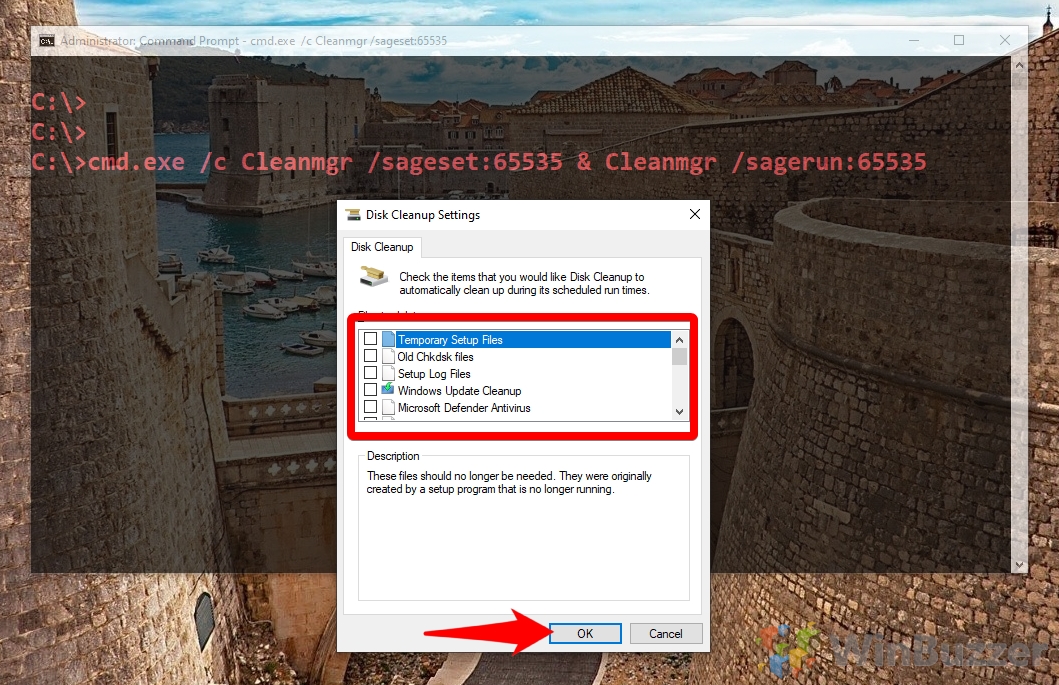
2. Run the Cleanmgr command
In the Command Prompt window,
type the following and press “Enter”:
cmd.exe
/c Cleanmgr /sageset:65535 & Cleanmgr /sagerun:65535
Disk Cleanup Settings will now launch. Tick the files you’d like to delete –
you’ll notice that you have more options than in the regular version, including
Chdsk files and Microsoft Defender and press “OK”.
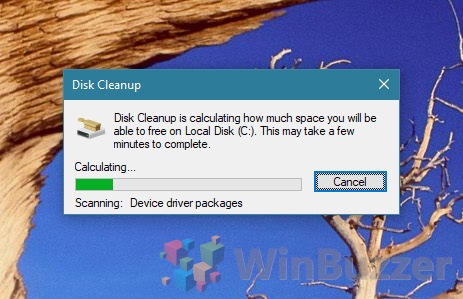
3. Wait for the process to
complete:
Windows will take a little time to remove the files
you selected. Make sure Command Prompt stays open while this happens.
Ø How to run Extended Disk
Cleanup via Shortcut
In
all likelihood, you’ll need to free up space in Windows 10 more than once. To
speed up the Extended Disk Cleanup process, you can create a shortcut on your
desktop.
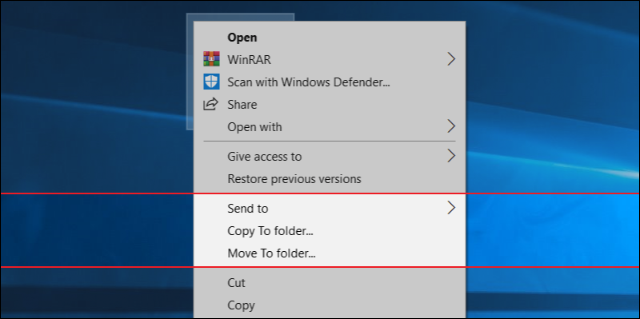
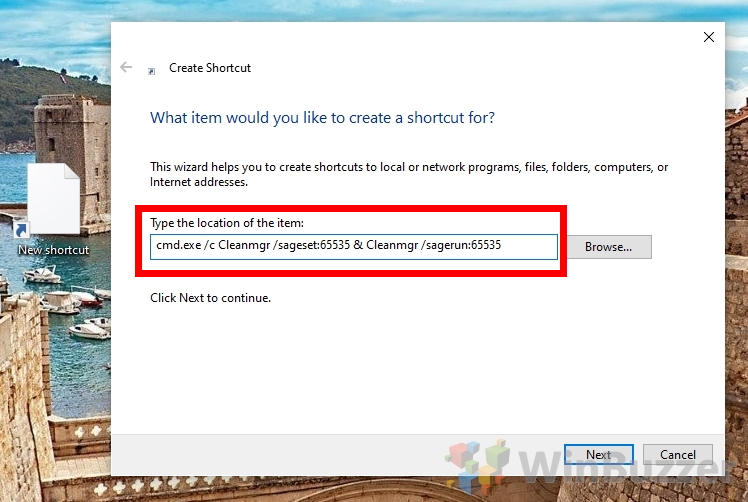
1. Create a new shortcut
Right-click on your desktop
and select “New > Shortcut”.
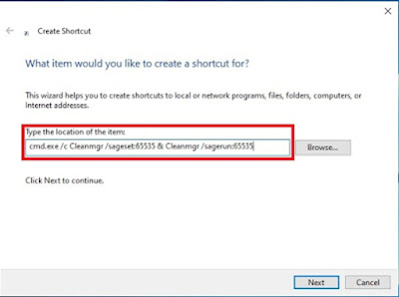
2. Enter the CMD command
In the location field, paste
the command we used in the previous step, which is:
cmd.exe
/c Cleanmgr /sageset:65535 & Cleanmgr /sagerun:65535
Press “Next”.
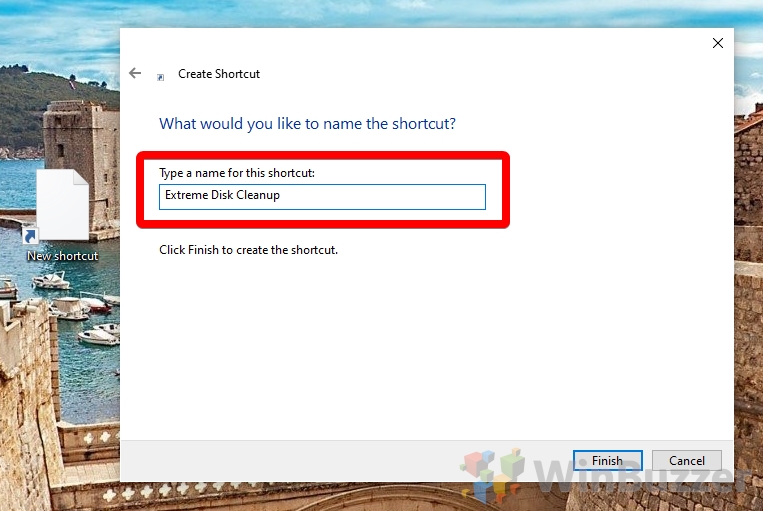
3. Give it a name
Name your shortcut whatever
makes the most sense to you. In our case, that’s “Extreme Disk Cleanup”.
Press “Finish”.
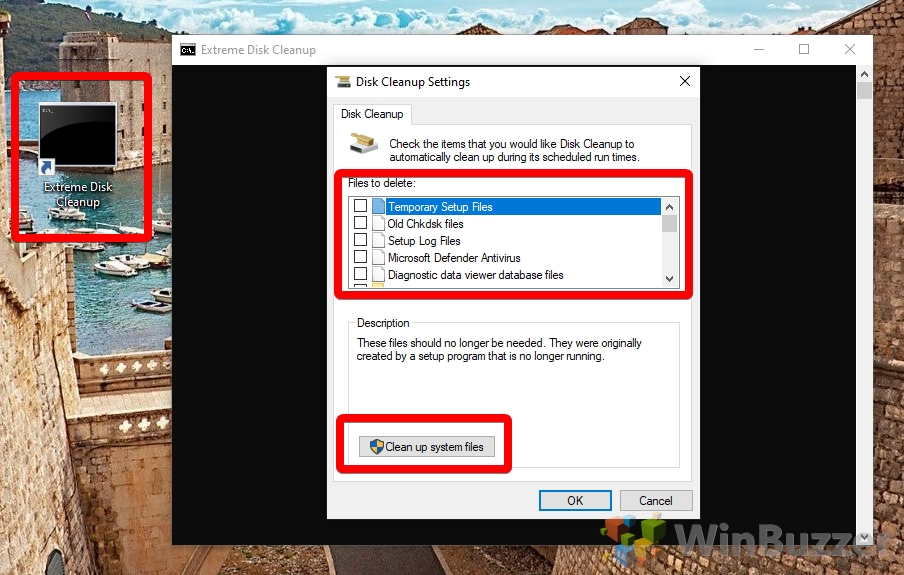
4. Open the shortcut
Double-click the shortcut to
open it. It should automatically open command prompt and then the Advanced Disk
Cleanup tool. Use it as normal, ticking the items you’d like to delete and also
running the “Clean up system files” tool.


Comments