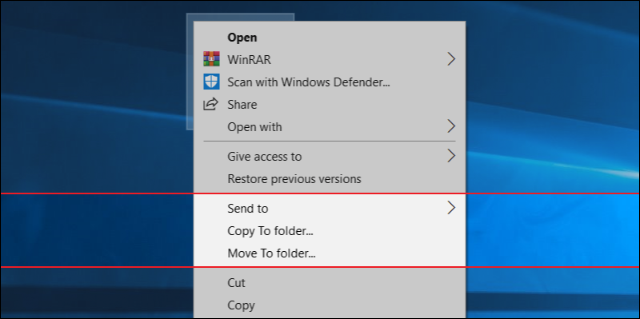
How to add Copy To and Move To buttons to the right-click menu

We will provide you with a lot of videos for education and reform. You can ask about any computer malfunction that happened or is happening with you You can donate to this account, even if it is worth at least $ 1, in order to continue giving and collecting information https://www.paypal.me/abdalrahmanaltall

Capturing screen images on the computer is very necessary during your daily use of the device, and here comes the role of the Snipping Tool, which was added to Windows starting from Windows Vista, as this tool was introduced as a free tool for capturing the screen. Although I do not use the tool frequently because there are other alternatives that offer better advantages, but if you are a person who does not take screenshots frequently (unlike what I do) then the Snipping Tool is the best solution for you and there is no need to use any third-party applications, and in this article you will We get to know this tool more and we will give you a set of tips, steps and tricks that will help you use the tool better.
The first thing we will talk about is how to open the tool and access it, so the easiest way is to use the Start Menu, where you can find it directly from the menu, and if you do not find it, use the search box, type Snipping Tool and it will appear at the same moment, click on it.
 |
You can also use the command prompt (Cmd) by pressing Windows key + R, then typing cmd in the Run field and pressing Enter, and finally, type snippingtool in the command prompt and press Enter again and the tool will open directly to you.
Finally, if you use the tool a lot, it is best to use what is known as a hotkey, which is a shortcut or a hotkey used from the keyboard for quick access to the tool. First, open the Start menu again and go to the Snipping Tool, click on it with the right mouse button, then on Properties, and finally from the Shourtcut key field, click on any shortcut you prefer and it will be applied to the tool and don't forget to click on Apply and then OK to save the settings.
The tool allows you to capture 4 different types of screen images:
Free-form Snip: This option allows you to create a free screen capture as you can use the tool freely and you will not have to be bound by straight lines, rectangles, etc.
Rectangular Snip: This is the default option that comes with the tool as it allows you to drag the cursor around the place or position you want to take a screenshot.
Window Snip: allows you to choose an open window such as a browser window or a program window and take a screenshot of it with just a click of a button on that open window.
Full-screen snip: Finally, this option allows you to capture the entire screen image without modification, just by pressing one button.
After choosing any of the previous options, just press the New button and it will start capturing screenshots.
You can access the Settings window or Snipping Tool Options by just clicking on the cog icon in the interface of the tool where you can do some useful adjustments, including:
Remove the white film that appears when you want to take a screen image, this white film prevents you from seeing the screen more clearly, so removing it will be much better. After opening the settings window, delete the confirmation mark next to the Show screen overlay when Snipping Tool option and then press OK and this will be disabled Option.
You can also modify the ink color option, which is the color in which the edges of the captured screen part appear when you use the tool, and you can change it to any other color you prefer just by clicking on the arrow next to the color, and don't forget to finally press OK.
There is a feature in the tool called Delay that you will only find on Windows 10 and 8, this feature simply delays the screen capture process for a few seconds, as this feature will help you a lot when you want to take a menu photo or something like that as it gives you enough time to open the list and wait until The screen shot is captured, all you have to do is press the Delay button on the tool, then choose the timing you want, which is in seconds, and finally press New and you will find that the tool delays a few seconds according to your choice, and then you capture the screen.
Comments